
Week 5
THE MILL X SCAD

My post content
With lots of feedback from our last meeting with the mentors, our team is ready to make the next big push for the week ahead. Although I won't list every mentioned line of feedback that isn't applicable to myself or my responsibilities, here is a compressed list of priorities I have on the list for the week ahead:
Shot 3 transition is reading as a glitch: align the vespas in the same exact position, and ensure the cameras between shots are the same movement.
For environment building in the week ahead, ensure everything is scaled the world size and they are relative to each other. Ex.: Building size and ground pattern size
Look at vespa in relation to objects around it
Needs displacement on the ground and bricks, beveled highlights within the scene will help tell the story of an object and how big it is
Goals for the week ahead:
With this in mind, after class, I made a list of goals I would need to get done in the week ahead:
1. Build modern environment (collab with Julee on assets, environment building, scale, look-dev). This will also include finding references and some minor modeling
2. Prepare scenes 3a and 3b for our fx artist, Wei-Lin, with corrected vespa/camera location between cuts to ensure smooth transition. This will also include a preliminary shaded vespa for him to render the fx with while our retro look-dev artist, Sara, is out of town for the weekend!
3. Continue lighting refinement
4. Begin compositing layers and adding DOF within shots. Consider rendering foreground separate from background
5. Continue tweaking license plate texture to show for the week ahead
6. Use a real-world scale human within your houdini scenes to aid in scaling objects accurately
7. Add displacement and bevels within growing environments
Week 5 Review Session Notes
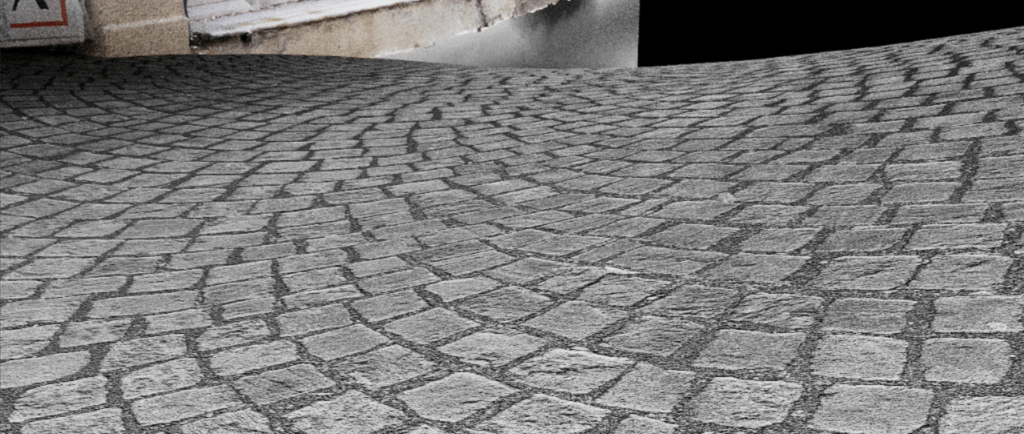
Displacement in Houdini
Looking at the cobblestone above, you will probably notice the clear lack of displacement along the smooth surface of the grid. Upon realization, there were a few things I had to do to ensure displacement would work correctly when plugged in as a texture map.
First, the grid I am using to texture (the street geo), must be subdivided several times until it can displace the ground based on the map realistically. After subdividing 9 times, I noticed no change in the render of the cobble. However, I did notice a large increase in render time with the sudden addition of several faces upon the large grid.
After some more research, I came to the realization that I was missing an important step within the redshift obj parameters added to the object node you want to displace: enabling displacement!
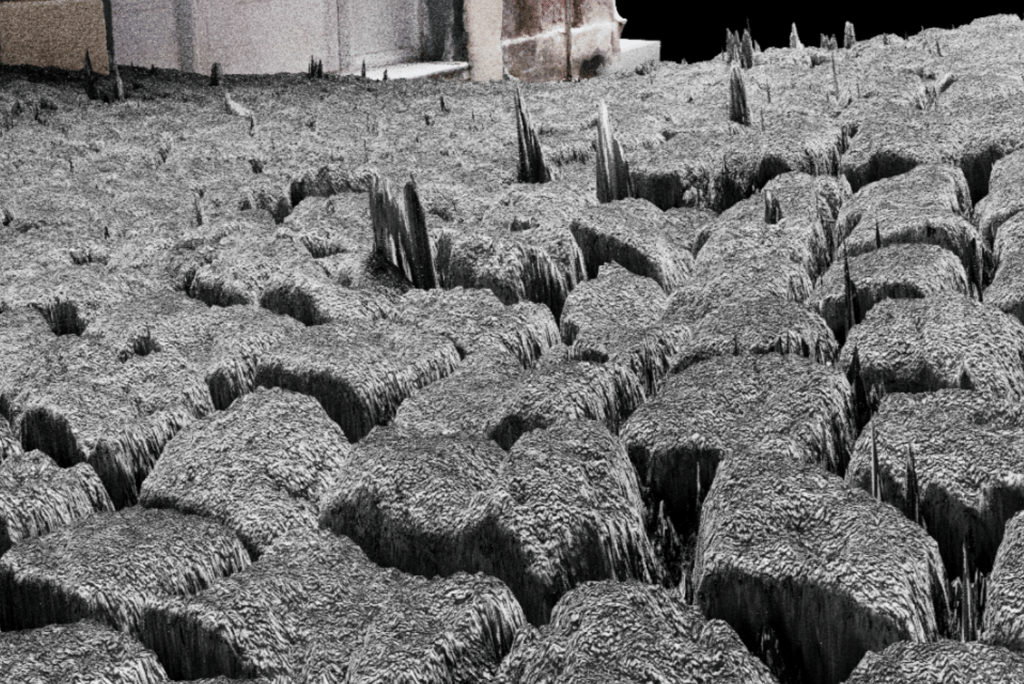
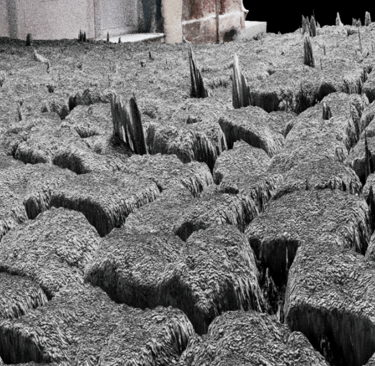
Now that the displacement was enabled and visibly working (working a lot!), I decided to make tweaks from there and adjust the tiling size using a tommy geo.

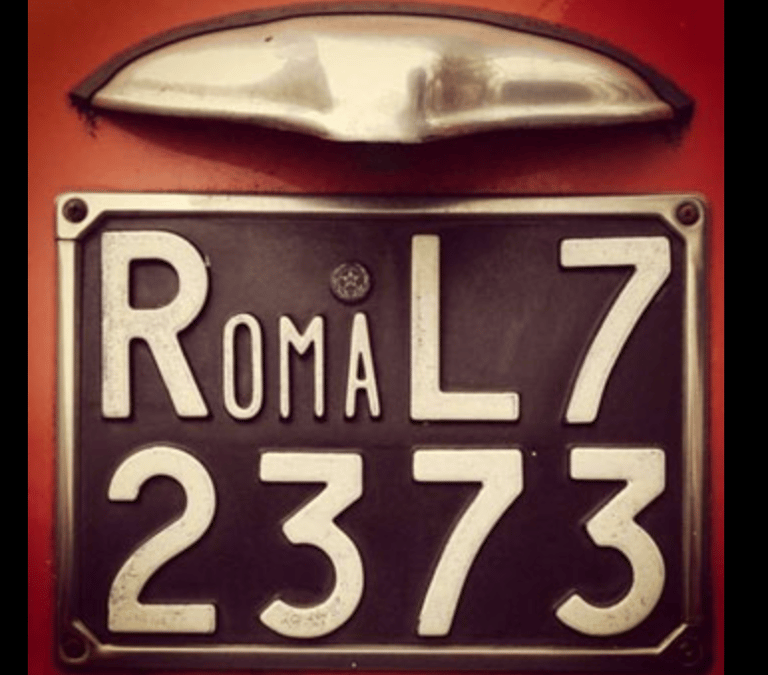
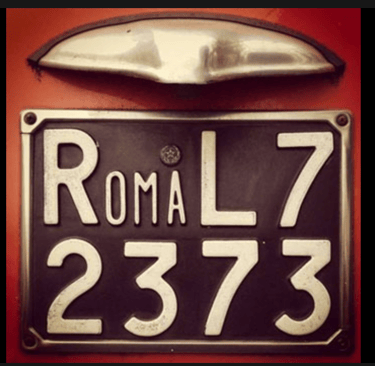
Here is the latest update of the license plate done in nuke. I have two options, where I can comp it on top of the plate according to the camera abc imported into nuke, or I can render out the sequence as a tiff sequence and use it as an animated texture on the license plate. I would prefer option 2, to get accurate lighting and shadows.

License Plate R&D
For the license plate, I was curious if I could accomplish the task more successfully in nuke instead of after effects, as I wasn't very fluid in the AE software as I was in Nuke. When i went into Nuke, I had two ideas:
I could Import the camera alembic and project the keyframed texture on a card. This would be eventually comped on top of the rendered plate.
Or, I could render out a tiff sequence and plug this into the material in Houdini so that it renders with the full exr sequence. This way I would be able to have the license have texture and a relaitonship with the in-scene lighting. This option is more preferable.